No items found.

We're excited to introduce Club Dispersion! This feature helps you visualize the likely landing area for each club directly on the map. Instead of showing a single carry distance, dispersion displays a realistic shot pattern based on your own historical performance, helping you make more informed club selections on the course.
Club Dispersion is a Premium feature. You'll also need to have tracked some shots so we can build your personal pattern.
Every golf shot has some variation in distance and direction. Club dispersion represents that variation as a pattern on the map, showing where your shots with a given club are most likely to finish. The pattern is generated entirely from your own recorded shot data — so it reflects the way you actually play.
By default, dispersion is shown two ways:
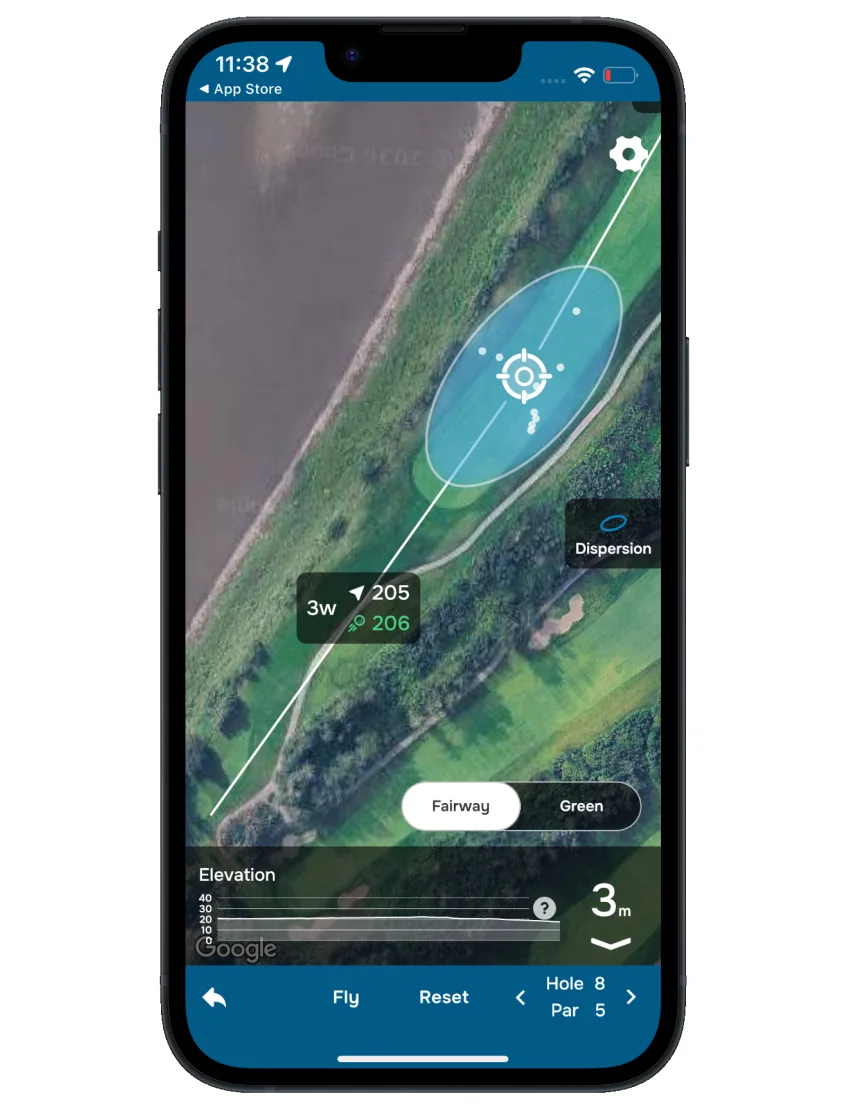
You can customize the look under Map Preferences > Map Dispersion > Customize — choose colors and opacity, and optionally turn on the dispersion ellipse, an outline that traces the boundary containing roughly 80% of your shots with that club.
Dispersion is built from the shots you've tracked across your recent rounds, grouped by club. As you play more rounds and track more shots, the pattern becomes more accurate and personalized.
A few things worth knowing:
If a club doesn't have enough data yet, you'll simply see your target marker without a dispersion pattern.
Club dispersion gives you a more realistic view of your shot potential than distance alone. By understanding both your typical distance and your shot spread, you can make smarter club selections, steer clear of hazards, and pick targets that give you the best chance of success. Use it as part of your course-management strategy to play with greater confidence and consistency.


Subscribe for early access to promotions, feature announcements & more.