No items found.

Marking the flag (or pin) position during your round ensures maximum accuracy in your stats — especially strokes gained and putting performance.
Here’s how to do it, step by step:
You've started your round and are tracking each shot using GPS with distance and position.
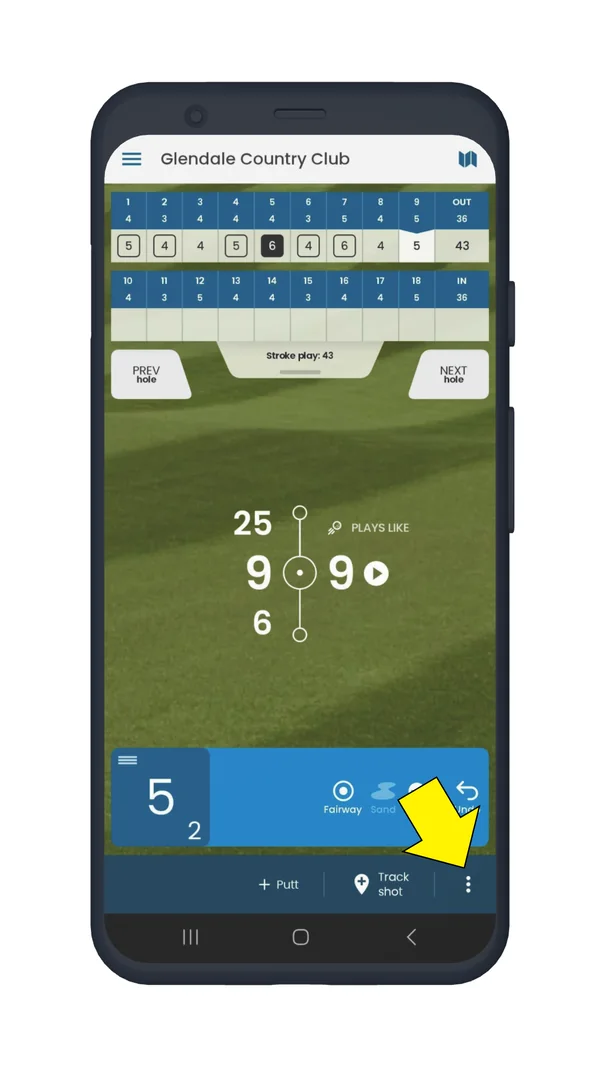
The simplest way to mark the flag is to tap the icon in the lower right with three vertical dots.
Next, select "Mark flag" in the menu that appears in the lower right.
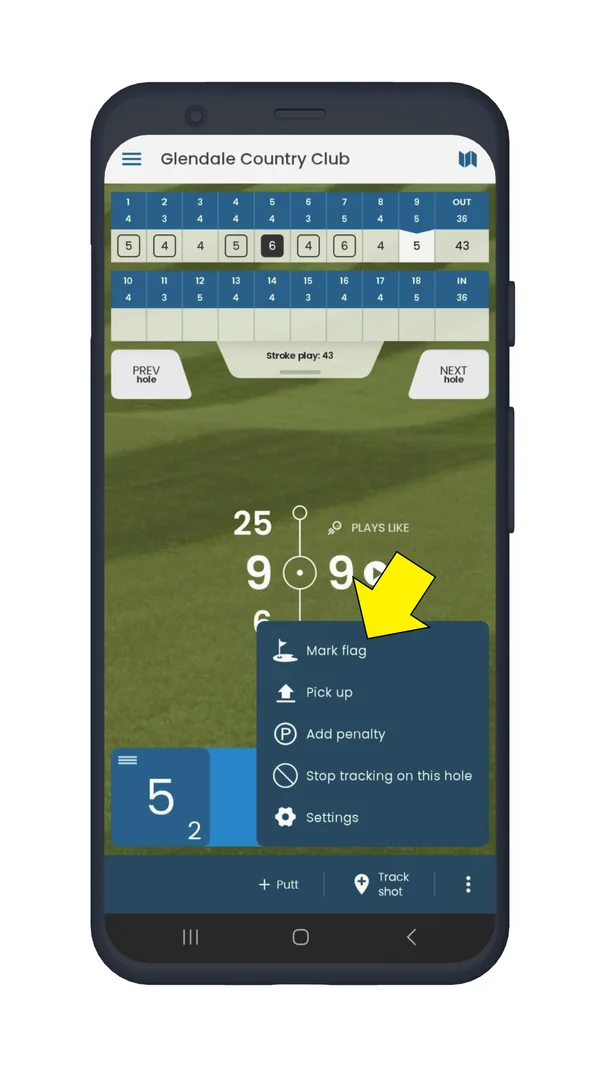
All set! The flag position is recorded on your current location on the green.
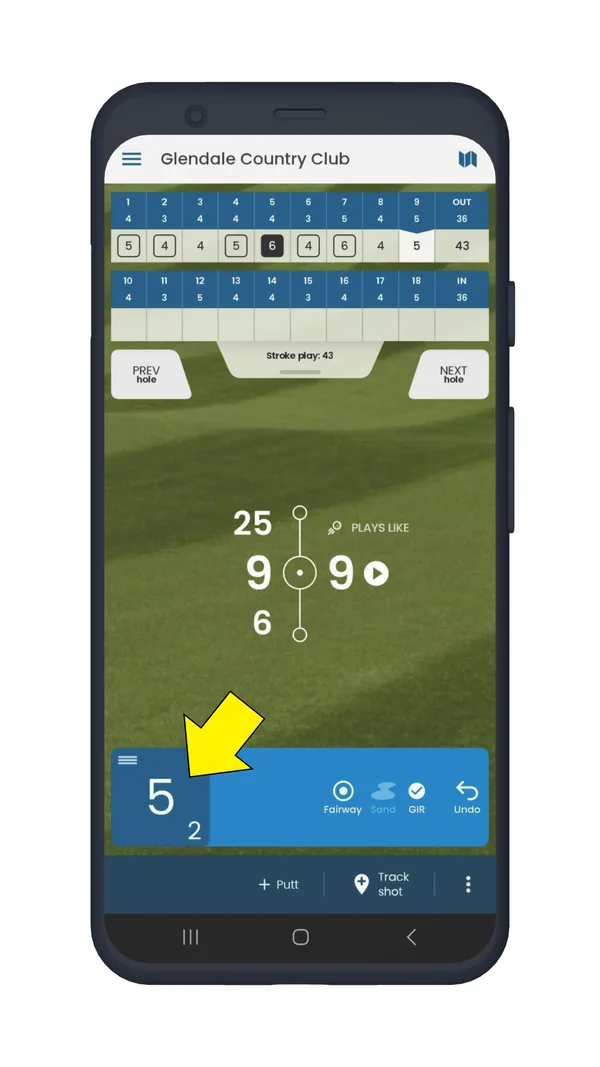
Tap the Quick score box.
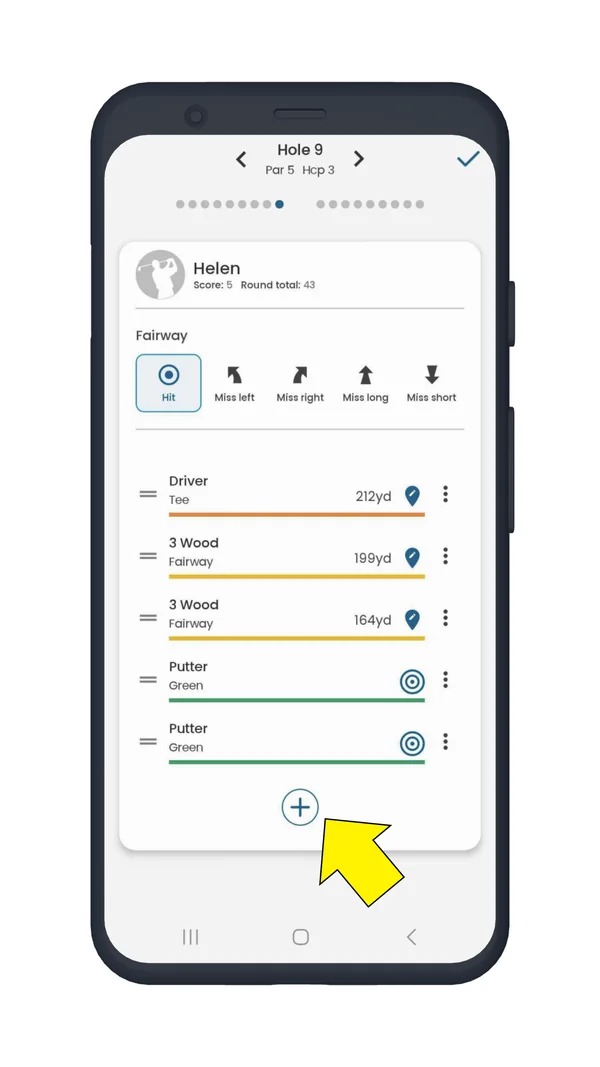
Tap the + symbol on the next screen.
Then tap "Set flag".
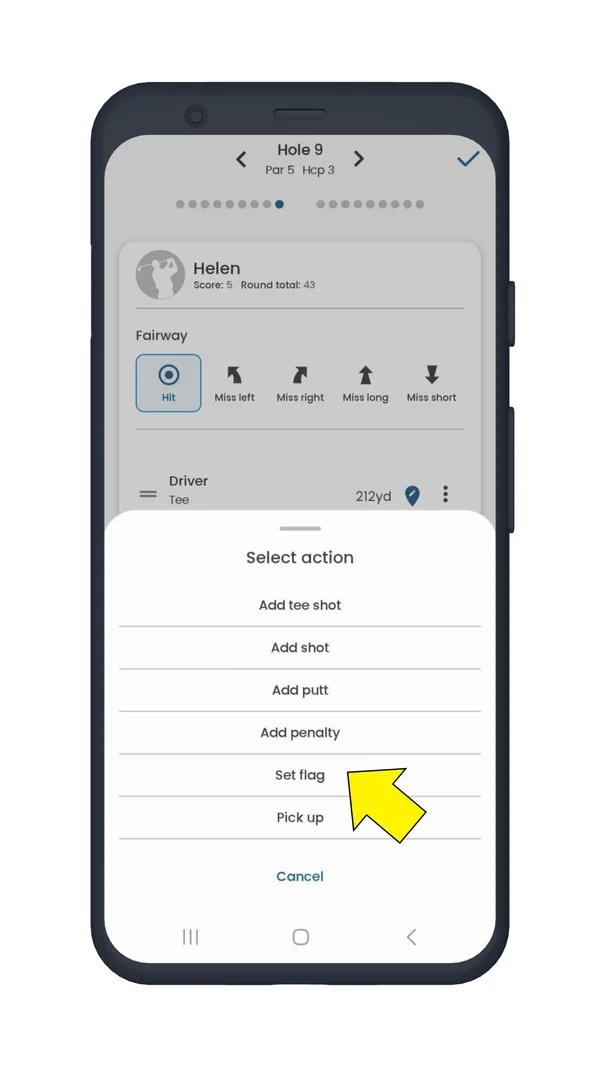
You'll see a map view of the green. Hold your finger down on the cursor until it is highlighted. Move the cursor with your finger to reflect the current position of the flag.
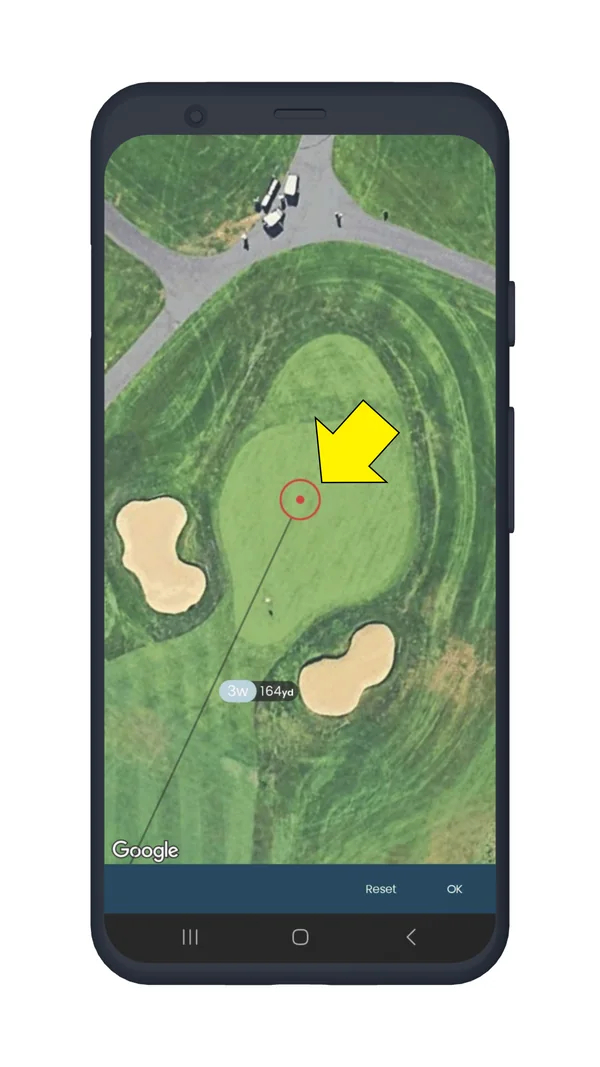
Tap "OK" in the lower right and you're done marking the flag position for that hole. Remember to do this with each hole to see more precise stats for things like strokes gained and putting.
Want help marking the flag using Golf Pad TAGS? Learn more here: How to assign a custom action like adding penalty or marking flag for TAGS?


Subscribe for early access to promotions, feature announcements & more.